とてもよく頑張って作ったし、出来栄えも悪くはないとは思うんだけど、「あぁすればよかったな、こうすればよかったな」と思うところが多く、手放しで喜べないところです。
ボクシングで言うとノックアウトではなくて、判定勝ち、な感じ。いや、何に勝ってるわけでもないんだけど。
いや、でも出来はそれなりにいいとは思うのよ。既製品ほどうまくできてなくて嫌なだけ。

My backpack has been completed.
I did my best and I think I did ok; it has turned out the way I envisioned it. However, there are so many things that with a hindsight I'm thinking "I should have done this, should have done that" that I can't really embrace it as an accomplishment. It feels like winning a boxing match with technical knockout rather than a clean KO.
I mean, it's ok enough; it's just not enough to beat the manufactured ones.

Anyway, here is my project summary:
The pattern is The Essential Backpack by Annie Unrein (byAnnie). According to her website, it's basically the same as her Back At Ya Mini Backpack Purse with slight instructional difference. I bought her Craftsy class, Sew Sturdy: The Essential Backpack.
The Craftsy class is great, as is her other Craftsy classes. I also have her travel organizer class, and her method for backpack is pretty similar. Basically, very quilter friendly.
The bag dimension is about 10" wide at the bottom, tapering towards the top, and 12" tall.
The bag has front exterior pocket with a pocket flat with magnetic snap closure.

The original instruction called for credit card pockets inside the front pocket, but I don't see myself putting credit cards in the front pocket so I just made a slip pocket divided into pen slots and a smaller pocket slot.

The back has a zippered pocket.
Hindsight #1: I wish I had covered the zipper ends for clean finish at the sides where the zipper meats the side panel. Because you sew the back panel first as a rectangular, then trim the tapering at the end, I did not think about it.
Hindsight #2: the back panel is basically 2 panels of exterior fabric (with fusible interfacing)/Soft & Stable (spongy interfacing)/interior fabric: 1 panel for the pocket, and 1 panel for the actual back panel. While the double layer make the bag very sturdy, it was very thick. I had to give up on the piping here because the seam, especially where the bottom strap is sewn, was about 1/2" thick and did not fit under the pressor foot. I could have made the pocket as a zippered welt pocket without the Soft & Stable to reduce the bulk.

The strap has a poly webbing inside so it has a nice body to it. The top grab handle is padded with Soft & Stable but I could have gotten away with just using the same covered webbing instead?
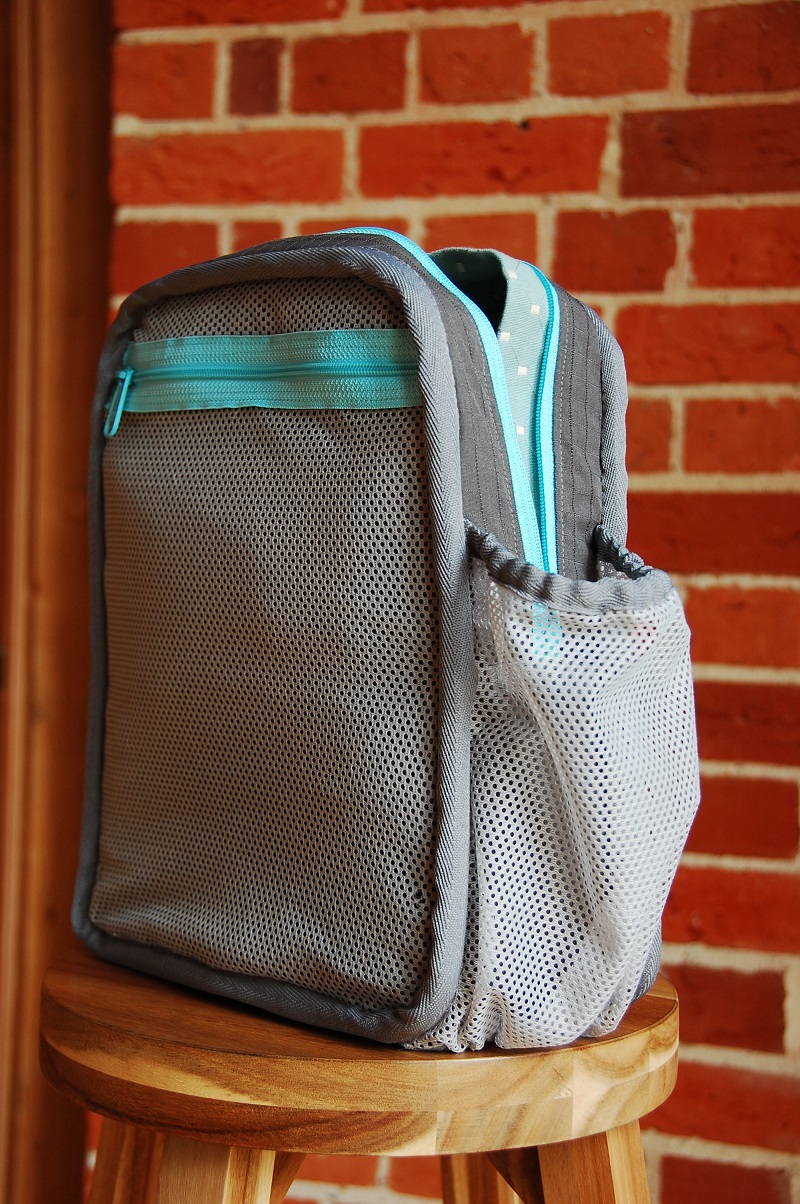
The inside has zippered mesh pocket on the front side, and a slip pocket on the back side.

Hindsight #3: While I love the mesh pocket idea, it is slightly awkward to use it since the zipper is towards the top. I might want to lower the zipper position a couple of inches.
I added a mesh pocket for a water bottle.
Because the original instruction is meant for quilting the exterior and the interior fabric together before construction, the instruction calls for the panels to be sewn right sides together, and the raw edges are covered with a bias binding.
Hindsight #4: Since I did not quilt the fabric, I could have sewn the interior and exterior fabric separately and bagged them.
My raw edges are covered with 1" twill tape. There was no way of this thick seams to go under the pressor foot, so I hand-stitched the twill tape entirely (while watching YouTube rabbit hole).


I also added a strip of fabric that covers the main zipper opening. I like how it looks, but slightly too tight around the corner (thanks to the very stiff piping) to open the zipper.
I added a piping at the front and the pocket flap.
My exterior fabric is John Lewis upholstery fabric, and the interior is Ripstop.
The pattern is made with 1/4" seam allowance. While it worked fine with assembling the parts, because of the thickness of my material, I had to sew with 3/8" SA to assemble the front and back panel with the side panel. My zipper foot was sliding off the edge if I tried 1/4" SA.
Overall, it's a pretty good pattern for a nice small backpack, and the Craftsy class was very enjoyable to watch. If you like Vera Bradley, this is it.
My lack of enthusiasm about the finished bag is mostly coming from the user error; I should have thought better considering the different kind of material I was using and the different look I was after. I actually had joined the bag contest on Pattern Review when I started this project and now I am debating if I should enter this bag... I have to sleep on it.
No comments:
Post a Comment